Client installation for ClassiX
The installation and configuration of the client (Citrix) for access to ClassiX® (nts05) takes place in two steps:
1. installation of the client
Call the setup programme and then select OK.
If necessary, confirm the security warning with Yes.
Confirm the InstallShield welcome page with continue, as well as all following pages:
Welcome: continue
Licence agreement: Yes
Target path: more
Programme folder: next
Name of the client: continue
Use local settings: Yes, continue
Installation completed: Finish
2. create the access configuration
After successful installation (and if necessary reboot/relogin) we find a new icon on the desktop and a corresponding entry in the start menu.
Double-clicking or selecting the entry opens a window with at least the entry "Add new entry". A double click on it opens the configuration dialog described below.
In the first window:
Description: ClassiX
Protocol: TCP/IP
Select server location -> in the next window:
Network protocol: TCP/IP
Select Add -> in the next window:
Enter location address Nts05
OK
OK
Select published application and enter ClassiX
Continue

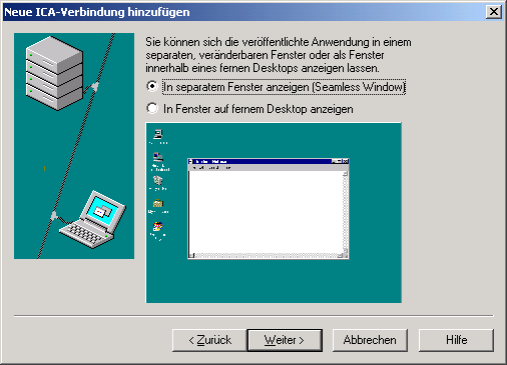
Next window:
Show in separate window
Continue

Next window:
Encryption level BASIC (default value)
Continue
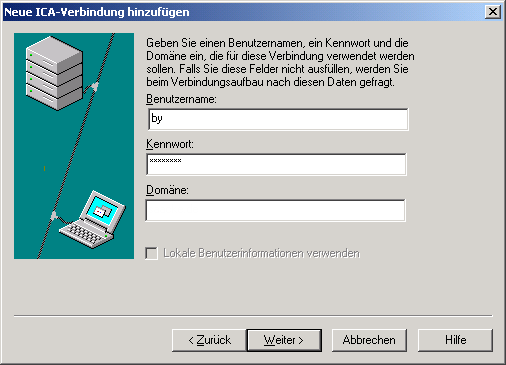
Next window:
Username: (abbreviation)
Password: (your password)
Domain: (Domain)
Continue

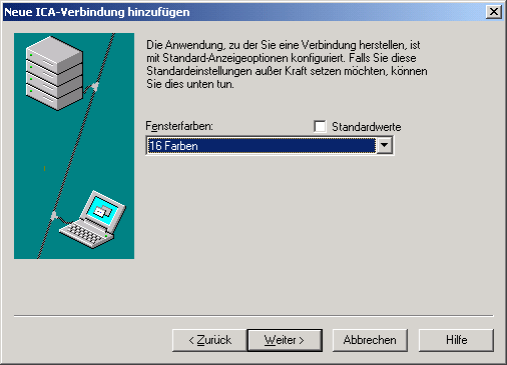
Next window:
Window colours: 16 colours (very important for correct display! )
Continue

Finish.
A shortcut to the new entry created in this way can be created by simply dragging it to the desktop.
Double-click on it:
- Automatic login to the central application server (nts05)
- Start of the ClassiX® programme
- Display at the workplace in individual windows (like local application)
The login or connection is normally terminated by exiting the application.